When you purchase through links on our site, we may earn a commission. Here’s how it works.
After a few seasons of gardening, you start to notice something about raised beds: the ones at garden centers look beautiful, but the price tags can be a little shocking.
Table of Contents
The good news is that building a raised garden bed doesn’t have to be complicated or expensive. In fact, with a few simple materials and a little bit of planning, you can create a sturdy garden bed that works just as well as many of the store-bought options.
Over the years, I’ve learned that plants don’t really care how fancy their garden bed looks. Give them healthy soil, enough sunlight, and a place to grow, and they’ll do just fine.
In this guide, I’ll show you how to build a raised garden bed using simple concrete blocks. It’s a straightforward project that most people can finish in an afternoon, and it’s one of the easiest ways to start growing vegetables at home.
Benefits of a Raised Garden Bed
Raised garden beds are popular for good reason. They make gardening more manageable, especially if your yard soil is less than ideal or your back starts negotiating after about twenty minutes of weeding.
- Improves drainage in heavy or compacted soil
- Helps reduce weeds
- Can discourage some pests and animals
- Keeps soil from washing away
- Warms up faster in the spring
- Reduces bending and back strain
For many gardeners, raised beds simply make growing food easier. You have more control over the soil, the layout, and the overall maintenance, which is especially helpful when you’re trying to keep things simple and affordable.
According to the University of Minnesota Extension, raised garden beds can improve soil drainage and make it easier to manage soil quality for vegetables and flowers.
Cheap Raised Garden Bed Project Overview
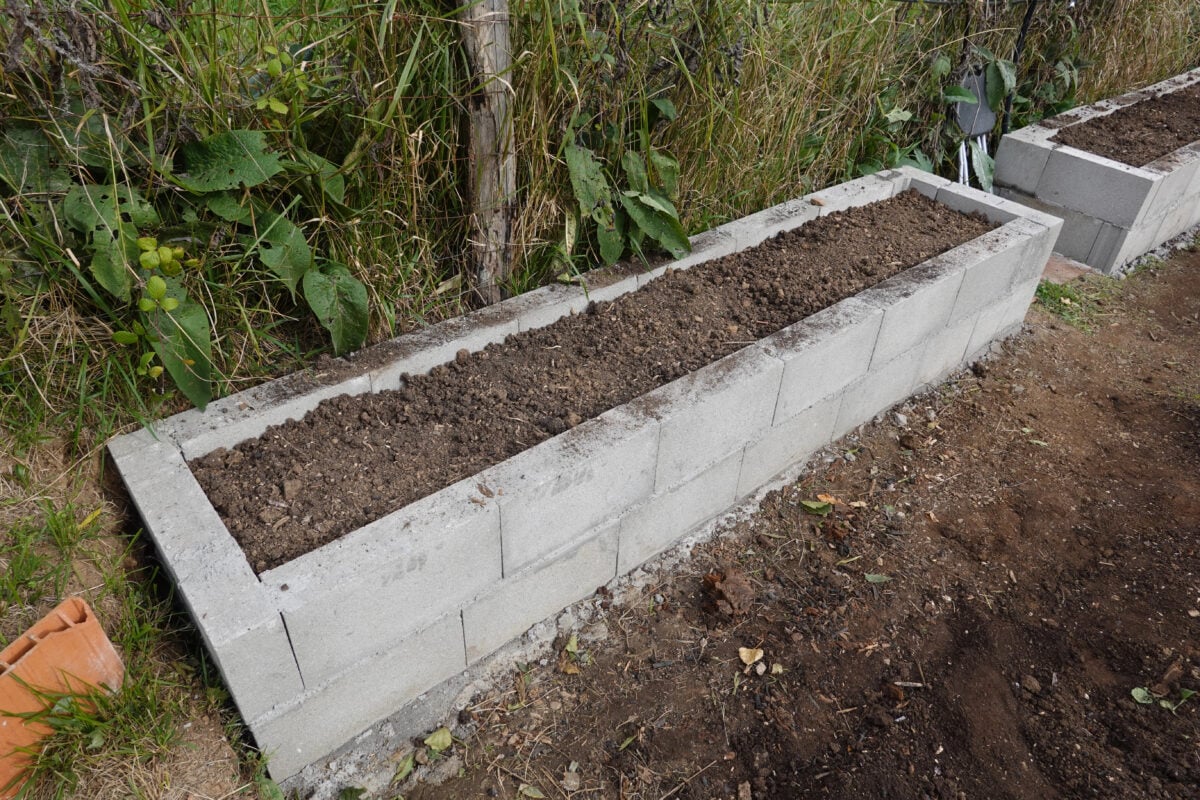
This raised garden bed uses simple concrete blocks and basic gardening tools. It’s an inexpensive project that can usually be completed in a single afternoon, even if you’re new to DIY garden projects.
| Estimated Cost | $55–$85, depending on soil and block prices |
|---|---|
| Main Material | Concrete (cinder) blocks |
| Estimated Build Time | 2–3 hours |
| Skill Level | Beginner |
| Bed Size in This Example | About 22 square feet |
Note: When this raised bed was originally built, the blocks cost about $22 total. Prices have increased since then, but this is still one of the cheapest ways to build a durable raised garden bed.
Materials Needed for a Cheap Raised Garden Bed
One of the reasons this raised bed design is so popular is that the materials are simple and easy to find. Most home improvement stores carry concrete blocks in several sizes, and you may already have some of the basic gardening tools needed for the project.
4 Main Materials
- Concrete blocks (about 24 blocks for the layout shown)
- Garden soil or topsoil
- Compost (optional but recommended)
- Peat moss or another soil amendment (optional)
Reccomended Tools
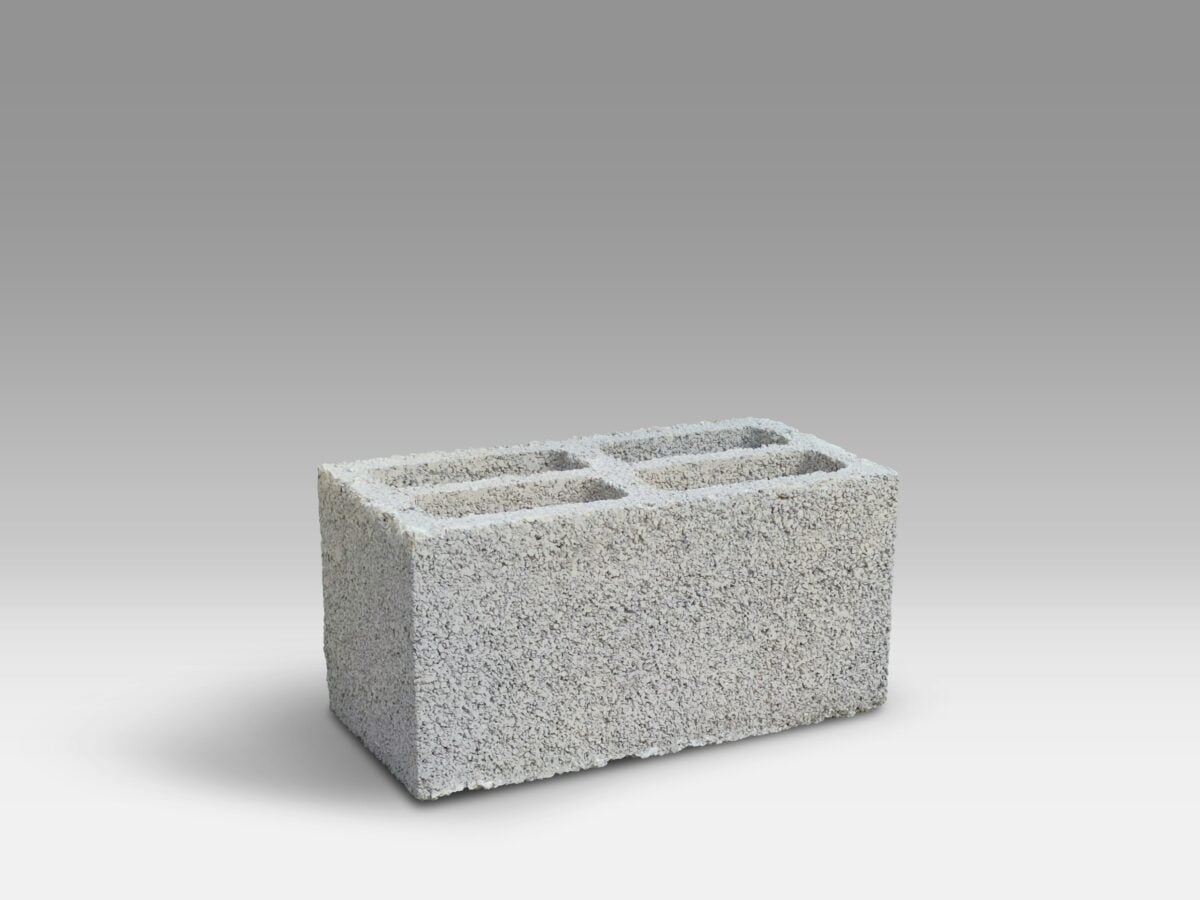
The raised bed in this guide uses standard concrete blocks measuring roughly 6 to 8 inches wide, 8 inches tall, and 16 inches long. At many home improvement stores today, these blocks cost around $2.40 each on average, although prices vary by region and by store.
You may also find other sizes available, including half blocks or decorative landscape blocks. These can work just as well, depending on the layout you want for your garden bed.
Slightly narrower blocks (around 6 inches wide) can make the bed easier to build and handle while still providing plenty of stability.
Choosing the Right Concrete Block Size
Concrete blocks come in several sizes, and most home improvement stores carry a few different options. The blocks used in this project are similar to the standard concrete masonry units you’ll find in the masonry section at most hardware stores.
While the layout shown in this guide uses blocks roughly 6 to 8 inches wide and 16 inches long, you can adjust the design depending on what sizes are available locally.
- Standard blocks (8 × 8 × 16 inches) – The most common size sold at hardware stores. These blocks are durable, widely available, and work well for building sturdy raised beds.
- 6-inch blocks (6 × 8 × 16 inches) – Slightly narrower than standard blocks, which makes them lighter and easier to handle. Many gardeners like this size because it takes up less planting space while still providing good stability.
- Half blocks (8 × 8 × 8 inches) – These are half the length of a standard block and can be helpful for adjusting the layout of your raised bed or creating tighter corners.
- Thin blocks (4 × 8 × 16 inches) – These are sometimes available for lighter masonry work. They can work for small raised beds, but they are less sturdy than thicker blocks.
- Solid cap blocks – These are flat concrete blocks often used as a top layer on retaining walls. Some gardeners use them to create a finished edge or a small seating ledge around the garden bed.
- Decorative landscape blocks – These blocks are designed for garden walls and landscaping projects. They can make the bed look more attractive, but they usually cost more than standard concrete blocks.
One advantage of building raised beds with concrete blocks is flexibility. You can easily change the shape of the bed, add more blocks later to expand the garden, or rearrange the layout if your gardening plans change.
Because the blocks are heavy, they usually stay in place without needing screws, brackets, or other fasteners, which makes this one of the simplest ways to build a raised garden bed.
Wood vs. Cinder Block Raised Garden Beds
Wooden raised beds are a classic choice, but I decided to go with cinder blocks for one very practical reason: they’re cheap, sturdy, and easy to rearrange.
| Feature | Wooden Raised Beds | Cinder Block Beds |
|---|---|---|
| Cost | Moderate to expensive | Very inexpensive |
| Durability | Usually around 10 years | Can last for decades |
| Maintenance | May warp, rot, or shift | Minimal maintenance |
| Flexibility | Fixed shape | Easy to rearrange |
| Appearance | More natural look | More industrial look |
| Weight | Lighter | Heavy to lift |
Wood may win the beauty contest, but cinder blocks win on price and longevity. And sometimes in the garden, function is the prettier choice.
Are Cinder Blocks and Pressure-Treated Lumber Earth-Friendly?
Some gardeners worry about using cinder blocks because older blocks were sometimes made with fly ash, a byproduct of coal burning.
While modern blocks typically do not use fly ash, it’s still smart to consider where your materials are coming from, especially if you’re using reclaimed blocks.
If you plan to use recycled blocks, it’s a good idea to pressure wash them before adding them to your garden to remove any surface contaminants.
If you’re considering wood instead, avoid older pressure-treated lumber. In the past, arsenic was used in the treatment process. Newer treated wood is safer, but many gardeners still prefer natural wood like cedar to be cautious.
How to Choose Garden Size and Location
Even if you’ve gardened for years, it still pays to start with a manageable space. A garden should feel rewarding, not like a second job that starts glaring at you from the backyard.
Many gardeners recommend beginning with two 4×8 raised beds for a vegetable garden, but every yard is different. In our case, we live in town, so space is limited, and our backyard slopes downhill. Not exactly a dreamy blank slate, but workable.
We also considered what we wanted to grow before choosing the final location. Our list included:
- Tomatoes
- Asparagus
- Zucchini
- Squash
- Spaghetti squash
- Sweet potatoes (space permitting)
That meant we needed a spot with plenty of sunlight and enough room to move around the bed comfortably.
How Much Sunlight Do Vegetables Need?
Vegetables are not especially shy about their sunlight needs.
Most vegetables require several hours of direct sunlight each day. The University of Illinois Extension recommends at least 6 hours of sunlight for many fruiting vegetables such as tomatoes and peppers.
- Tomatoes, peppers, asparagus, zucchini, squash, and eggplant: 6–8 hours per day
- Carrots and potatoes: 4–6 hours per day
- Herbs: about 4 hours per day
- Leafy greens: 3–4 hours per day
Since most of the vegetables we wanted to grow needed at least six hours of sunlight, we placed our garden on the south side of the house. That area gets strong sun before our large trees begin casting shade later in the day.
It also happened to be one of the flatter areas in our yard, which made the project much easier.
Call Before You Dig
Before breaking ground, always have utility lines marked. It may not be the most exciting part of building a garden bed, but it is dramatically more exciting than accidentally meeting a buried line the hard way.
We contacted the proper utility service and had the area marked before digging. Within two days, the lines were spray-painted and clearly visible.
As it turned out, there were quite a few utility lines in the area where we originally hoped to put the raised bed. That forced us to adjust the shape of our garden, which is why it ended up looking a little unconventional.
Still, a slightly odd-shaped raised bed is far better than a preventable disaster. Don’t skip this step.
Planning Your Raised Garden Bed Layout
Before placing your blocks permanently, it helps to experiment with the layout of your raised garden bed. One of the advantages of using concrete blocks is that they’re easy to move around, so you can test different shapes until you find a layout that works best for your yard.
Take a little time to think about how you’ll move around the garden, where the sunlight falls during the day, and whether your yard has any slopes or obstacles. A few small adjustments in the planning stage can make the garden much easier to maintain later.
L-Shaped Raised Garden Beds for Corners
If your garden space sits in a corner of the yard or along a fence, an L-shaped raised bed can be a very practical layout. Instead of building one long rectangular bed, you can arrange the blocks to form two connected sides that follow the edge of your space.
This layout keeps plants within easy reach while maximizing the growing area. It also allows you to create comfortable walking paths along the outside edges of the bed.
L-shaped beds are especially useful in smaller yards where you want to tuck the garden neatly into a corner without taking up too much open space.
Tiered Raised Beds for Sloped Yards
If your yard slopes downhill, building tiered raised beds can help create flat planting areas while preventing soil from washing away during heavy rain.
This can be done by building one raised bed slightly higher than the next, following the natural slope of the yard. Each level acts like a small retaining wall that helps hold soil in place.
Concrete blocks work particularly well for this type of layout because they are heavy and easy to stack securely. Even a simple two-level design can make gardening on a slope much easier.
Creative Layout Ideas
Concrete blocks can also be used for more than just vegetable beds. In another part of our yard, I used the same stacking method to build an abstract-style planter for flowers that also serves as a small privacy wall.
By turning some of the blocks in different directions and filling a few of the openings with soil, it created a simple garden feature that adds height, color, and a bit of screening from neighboring yards. Adding flowering plants around your garden can also help attract pollinators. The USDA Forest Service pollinator program highlights the important role pollinators play in supporting healthy ecosystems and food production.
It’s a good reminder that these blocks are very flexible. You can experiment with different layouts and designs depending on what your space needs.
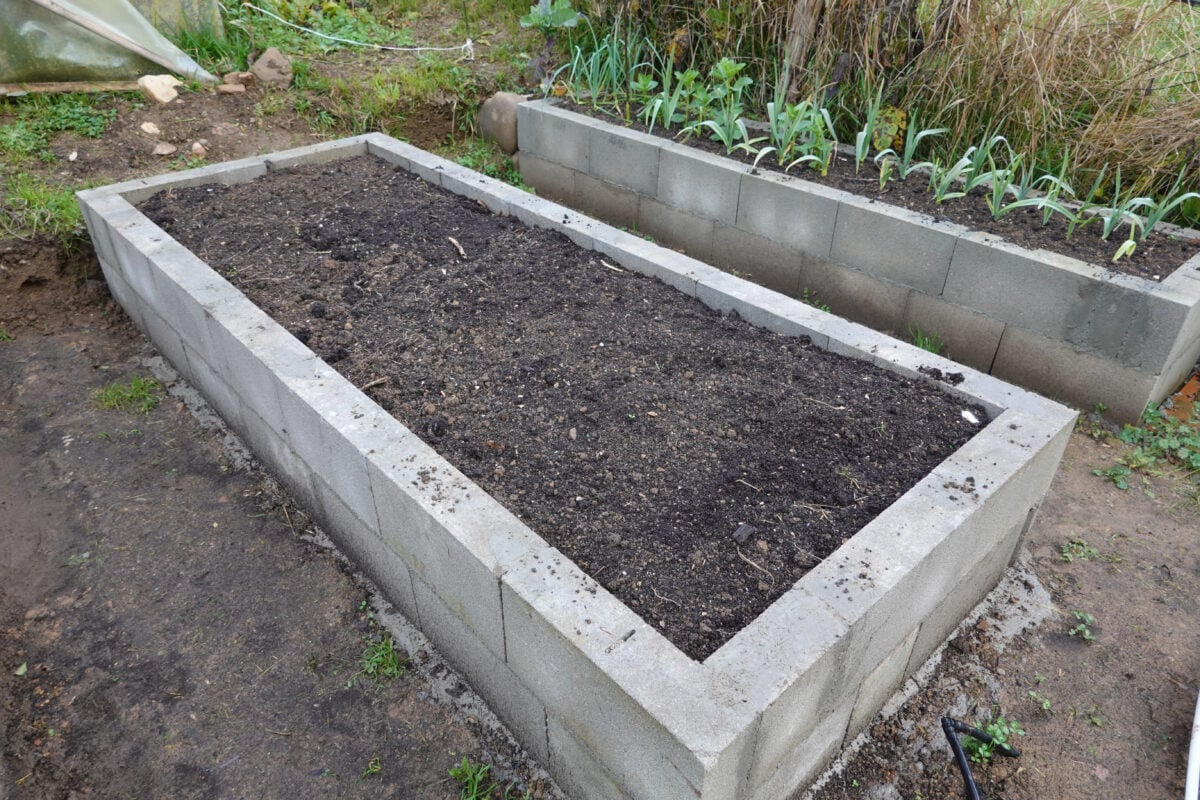
How to Build a Cheap Raised Garden Bed Step-by-Step
Once we decided where the garden would go, it was time to start building the raised bed itself. We chose to use concrete blocks because they’re simple to work with, easy to rearrange, and available at almost any home improvement store.
The bed in this example uses about 24 concrete blocks and creates a growing area of roughly 22 square feet. The exact block size may vary depending on what your local store carries.
One thing I like about building raised beds this way is how flexible the layout can be. You can adjust the shape, expand the garden later, or even move the blocks if your plans change.
Here’s the step-by-step process we followed to build our raised garden bed.
1. Outline the Garden With Concrete Blocks
The first step is to lay the blocks on the ground to outline the shape of your garden bed. This helps you visualize the size and layout before you start digging.
In our case, we had utility lines marked in the yard, so we had to position the blocks carefully to avoid the spray-painted areas. If your yard has utility markings, remember that the lines may not be perfectly exact, so leave a little extra space just to be safe.
Tip: We also left walking space along the outside edges so we could easily reach plants later when the bed is full of vegetables.
2. Remove the Grass
Once the layout looked right, we removed the grass from inside the garden bed. This turned out to be the most physically demanding part of the entire project.
A combination of a pitchfork, a round-point shovel, and a square shovel worked well for lifting and removing the turf.
Try not to remove more soil than necessary. If you dig too deeply, you’ll need to add extra soil later to refill the bed.
We added the removed grass to our compost bin so it wouldn’t go to waste.
Tip: When removing grass, angle the shovel or pitchfork just below the grass roots. This helps lift the turf more cleanly while leaving most of the soil behind.
3. Loosen the Soil
After removing the grass, we loosened the soil inside the bed using a small tiller. This helps improve drainage and allows plant roots to grow more easily.
If you don’t have a tiller, you can still loosen the soil with a garden fork or shovel. It takes a little more effort, but it works just as well for smaller beds.
4. Place the Blocks in Their Final Position
Once the soil is prepared, place the concrete blocks back into position around the edge of the garden bed.
If you remove the grass or dig slightly below ground level, the blocks will sit more securely and create a more stable frame.
Take a few minutes to make sure the blocks line up the way you want before filling the bed with soil.
Optional: Add Cardboard or Landscape Fabric Under the Bed
Before filling the raised bed with soil, some gardeners like to place a layer of cardboard or landscape fabric on the ground inside the frame. This helps suppress existing grass and weeds that might otherwise grow up into the garden bed.
- Cardboard is a popular choice because it slowly breaks down over time while improving the soil beneath the bed. Simply lay down overlapping pieces of plain cardboard before adding soil.
- Landscape fabric is another option and can provide longer-lasting weed suppression, although it doesn’t break down like cardboard does.
This step isn’t required, but it can make the bed easier to maintain during the first season while the soil and plants become established.
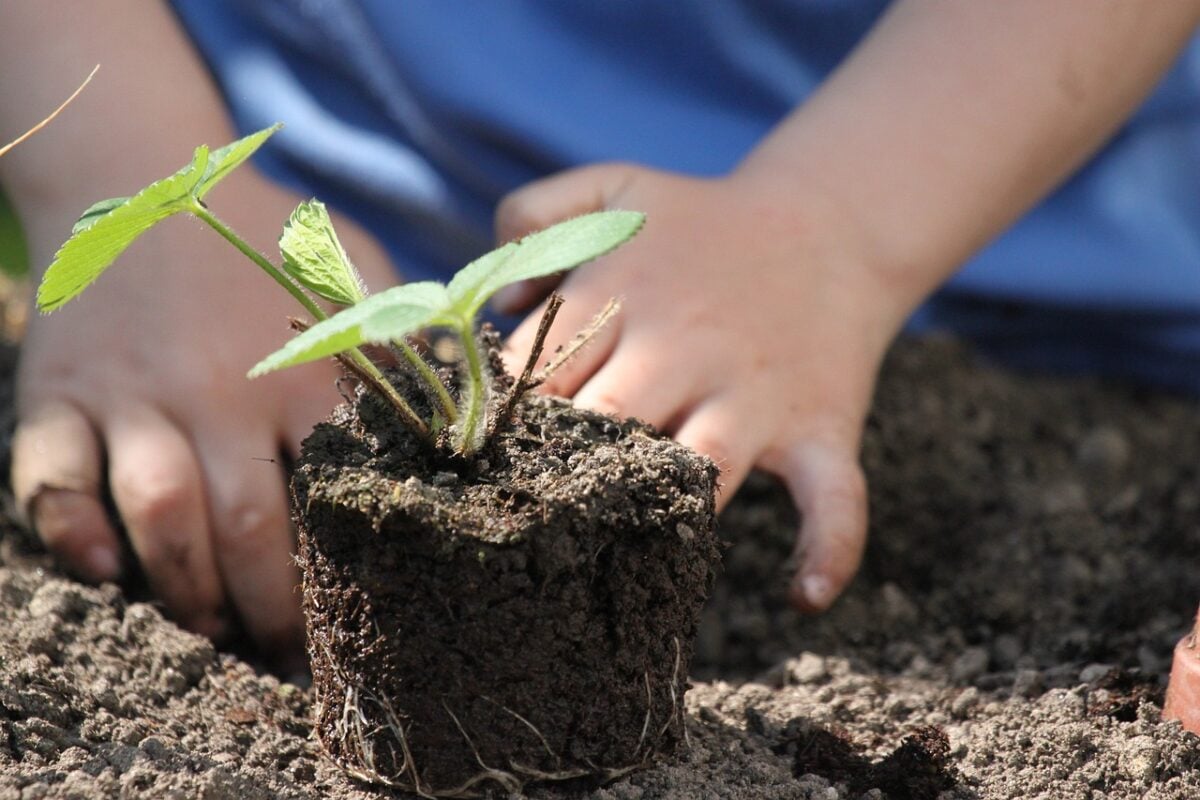
5. Fill the Raised Bed With Soil
The final step is filling the bed with soil.
We added peat moss to help build up the soil in our garden bed. In future seasons, we plan to add compost from our compost bin as it becomes available.
Many gardeners use a mixture of compost, topsoil, and peat moss (or another soil amendment) to create a loose, nutrient-rich soil that drains well and supports healthy plant growth.
How full you fill the bed is up to you, but leaving a small space below the top of the blocks helps keep soil from spilling over the edges when watering.
If you’d like to see a similar raised garden bed project in action, this video gives a helpful visual overview of the process.
Mixing Wood and Concrete Blocks
Another option some gardeners like is combining concrete blocks with wood. Instead of stacking blocks all the way around the bed, you can use the blocks as corner supports and slide wooden boards between them to form the sides of the garden bed.
This approach gives you the durability and stability of concrete blocks while still providing the cleaner look of wood panels. It can also make the bed lighter and easier to customize since boards are easier to cut and replace if needed.
If you try this method, cedar or other naturally rot-resistant wood tends to hold up best in outdoor garden beds. It’s a nice compromise if you like the strength of concrete blocks but prefer a more traditional raised garden bed appearance.
Planting in Concrete Block Holes (A Simple Garden Upgrade)
One clever advantage of using concrete blocks for a raised garden bed is that the hollow openings in the blocks can double as mini planters. Instead of leaving them empty, many gardeners fill the holes with soil and plant herbs, flowers, or other small companion plants.
It’s a simple upgrade that helps soften the look of the concrete while also adding a little extra growing space around the edge of your garden bed.
Plants That Work Well in Block Holes
The openings in standard concrete blocks aren’t very large, so it’s best to choose plants with shallow roots or compact growth habits.
- Herbs such as thyme, oregano, or chives
- Small flowers like marigolds or alyssum
- Succulents in warmer climates
- Trailing plants that can spill over the sides of the blocks
These smaller plants typically won’t compete much with the vegetables growing in the main garden bed.
Benefits of Planting in the Block Openings
Using the block holes as planting pockets provides several benefits:
- Creates extra growing space without expanding the garden bed
- Improves the overall appearance of the bed by softening the concrete edges
- Allows for companion planting around vegetables
- Supports pollinators when flowering plants are added
For example, many gardeners plant marigolds in the block openings because they attract pollinators and can help deter certain garden pests.
A Simple Tip Before Planting
Before filling the block holes with soil, make sure they drain properly. If the blocks sit directly on soil, drainage usually isn’t a problem. However, if they sit on compacted ground or a hard surface, adding a small layer of gravel or small rocks in the bottom of the opening can help prevent water from collecting.
This small detail turns a basic raised garden bed into a more functional and attractive garden feature while making good use of space that would otherwise go unused.
8 Optional Upgrades for Your Raised Garden Bed
One of the nice things about building a raised garden bed with concrete blocks is that it’s easy to keep things simple at first and add improvements later. If you decide to upgrade the bed over time, there are several small changes that can make it more stable, more attractive, or easier to maintain.
1. Secure the Blocks With Concrete Adhesive
If you plan to keep your raised bed in the same spot for many years, you may want to secure the blocks with a construction or concrete adhesive. A small bead of adhesive between the blocks can help prevent shifting, especially if your yard has uneven ground.
This step is optional, but it can make the structure feel a bit more permanent.
2. Place Boards Under the Blocks
Another option is placing pressure-treated boards or landscape timbers underneath the blocks before assembling the bed. This can help create a more level base and may prevent the blocks from settling unevenly over time.
Boards can also be helpful if you’re building the raised bed on soft soil or in an area that tends to stay damp.
3. Add a Finished Edge With Cap Blocks
Some gardeners like to add flat cap blocks or decorative landscape blocks along the top of the bed. These create a smoother edge and can even double as a small seat while you’re working in the garden.
While this adds a little extra cost, it can give the raised bed a more finished look.
4. Paint or Stain the Blocks
If the gray concrete look isn’t your favorite, you can paint the blocks to match your garden or landscaping. Masonry paint works best because it’s designed to adhere to concrete and withstand outdoor conditions.
Some gardeners paint the entire bed, while others add simple decorative touches such as patterns, borders, or bright colors to make the garden feel more personalized.
5. Add Gravel for Better Drainage
If your yard tends to hold water, placing a thin layer of gravel under the blocks can help improve drainage and create a more stable base.
This step is especially helpful if you’re building the raised bed on heavy clay soil.
6. Reinforce the Blocks With Rebar
If you want a little extra stability, you can reinforce the corners of the bed with short pieces of rebar. After placing the blocks in position, drive a piece of rebar through the hollow opening of the block and into the ground using a hammer or mallet.
This helps anchor the blocks in place and can be especially useful in areas with soft soil, sloped yards, or places where the bed may get bumped while gardening.
Many gardeners only add rebar at the corners, but you can add more along longer sections if you want additional reinforcement.
7. Add a Simple Garden Cover or Mini Greenhouse
Another useful upgrade is adding a lightweight topper or cover over the raised bed. Some gardeners place simple hoops made from PVC pipe, metal conduit, or flexible tubing across the bed and cover them with garden fabric or clear plastic.
This creates a small tunnel that can help protect plants from frost, extend the growing season, and keep certain pests away from young plants.
These covers are easy to remove when the weather warms up and can make a big difference early in the spring or late in the fall.
8. Use the Block Holes for Trellis Supports
The hollow openings in concrete blocks can also be used to support simple garden trellises. By inserting wooden stakes, bamboo poles, or metal conduit into the block holes, you can quickly create a sturdy frame for climbing plants.
This works well for vegetables such as tomatoes, cucumbers, peas, and pole beans that benefit from vertical support.
Once the supports are in place, you can add garden twine, netting, or wire between the stakes to form a trellis. The weight of the blocks helps keep the structure stable, and the supports can easily be removed or adjusted as the plants grow.
It’s a simple way to add vertical growing space while making good use of the block openings that might otherwise go unused.
None of these upgrades are required to build a functional raised garden bed, but they can be nice additions if you want to improve the appearance or longevity of the structure.
Using Reclaimed Concrete Blocks to Save Money
If you’re trying to keep costs as low as possible, another option is using reclaimed or secondhand concrete blocks. Many people give away leftover blocks from landscaping or construction projects, and they often show up in local classifieds, community groups, or neighborhood marketplaces.
Using reclaimed materials can significantly reduce the cost of building a raised garden bed, and it also keeps usable materials out of the landfill.
Before using secondhand blocks in a vegetable garden, it’s a good idea to give them a quick inspection and cleaning. Make sure they are structurally sound and free of cracks or crumbling edges. If the blocks were previously used in another project, wash them with a hose or pressure washer to remove any dirt or residue.
It’s also wise to avoid blocks that may have been exposed to unknown chemicals or industrial materials. When in doubt, stick with blocks that came from landscaping or residential projects.
With a little patience, you may be able to find enough reclaimed blocks to build your entire raised garden bed for very little money.
Creative Concrete Block Garden Ideas
One of the fun parts of building with concrete blocks is experimenting with different layouts and designs. If you’re curious how others have used them in their gardens, the video below highlights several creative ideas you might want to try.
Even simple ideas like these can make a basic raised bed feel more like a finished part of your garden.
Caring for Your Raised Garden Bed
Once your raised garden bed is built and planted, a little regular care will help keep it productive for many seasons. Raised beds are generally easy to maintain, but a few simple habits can make a big difference.
Add Compost Each Season
Over time, plants use up nutrients in the soil. Adding compost at the start of each growing season helps replenish nutrients and keeps the soil healthy for vegetables and flowers.
Use Mulch to Retain Moisture
A layer of mulch can help the soil retain moisture and reduce weeds. Materials such as straw, shredded leaves, or wood chips work well in most raised beds.
Check Soil Moisture Regularly
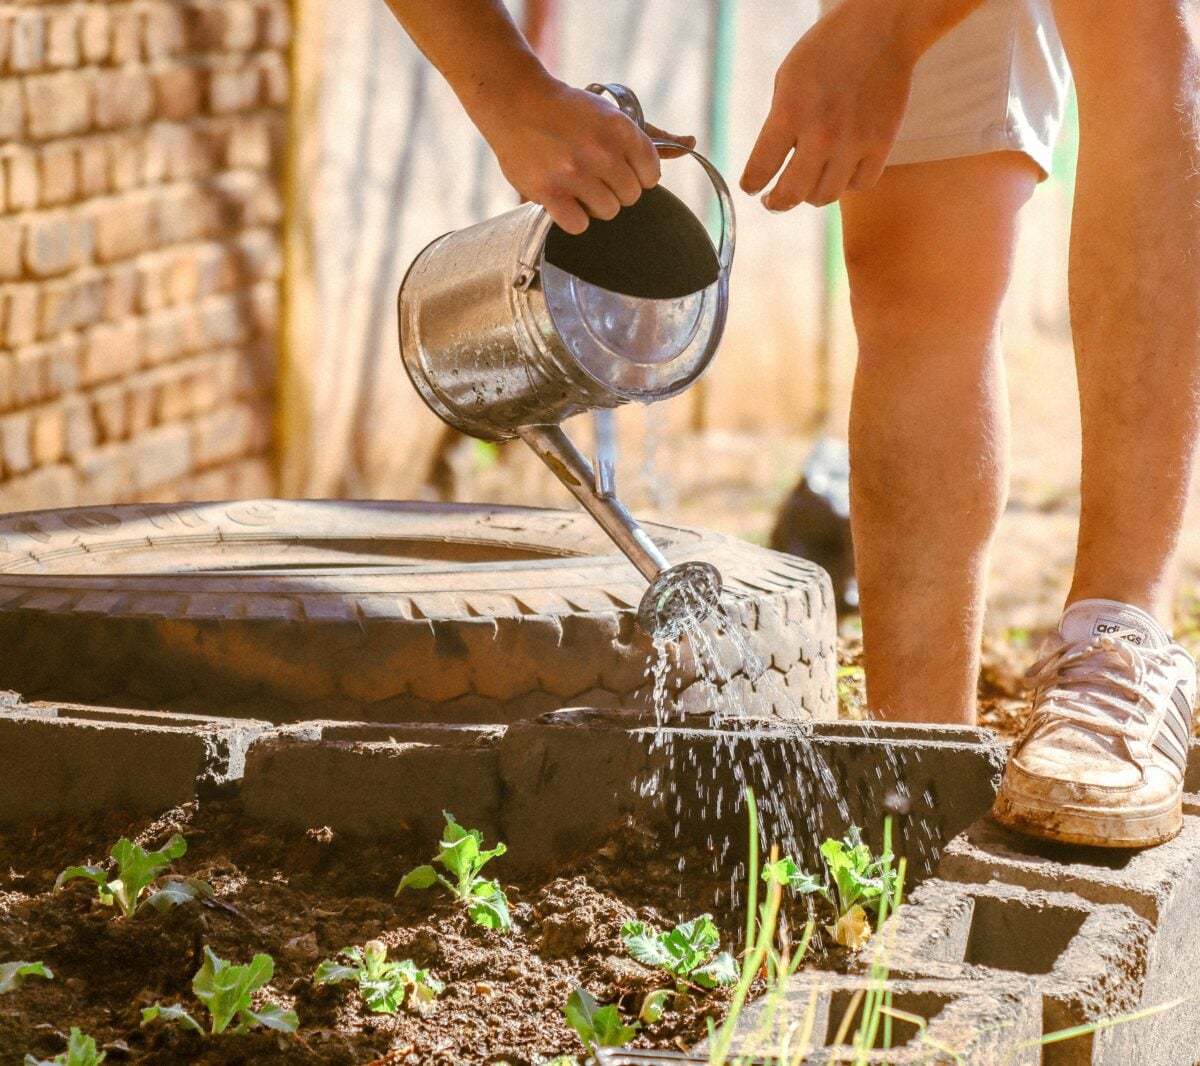
Raised beds tend to drain well, which is great for plant health but can also mean the soil dries out faster during hot weather. Check the soil regularly and water when the top inch begins to feel dry.
Rotate Crops Each Year
If you grow vegetables, rotating crops from year to year can help reduce pests and soil-borne diseases. For example, try planting tomatoes in a different part of the bed the following season.
With a little seasonal care, a simple raised garden bed like this can stay productive for many years.
Common Questions About Building Raised Garden Beds Cheaply
Below are a few questions gardeners commonly ask when building a raised garden bed. If you have another question or a tip from your own experience, feel free to share it in the comments.
How deep should a raised garden bed be?
Most vegetables grow well in raised beds that are at least 10–12 inches deep. Root crops such as carrots or potatoes may benefit from slightly deeper soil, but many common garden plants like lettuce, herbs, tomatoes, and peppers grow well in beds around one foot deep.
Are concrete blocks safe for vegetable gardens?
Standard concrete blocks are commonly used in raised garden beds and are generally considered safe for growing vegetables. If you are using reclaimed blocks, it’s a good idea to clean them first and avoid blocks that may have been exposed to unknown chemicals or industrial materials.
What should you put in the bottom of a raised garden bed?
Many gardeners place cardboard, landscape fabric, or a layer of organic material such as leaves or small branches at the bottom of the bed. These materials help suppress weeds and can improve soil structure as they break down over time.
Continue Improving Your Garden
Once your raised garden bed is set up, there are plenty of other simple projects that can make your garden healthier and easier to maintain. Small improvements like better soil care, water collection, and natural pest control can make a big difference over time.
If you’re looking for a few more ideas to improve your yard and garden, you might find these guides helpful:
- Best Organic Lawn Fertilizer – Learn how to naturally improve soil health and keep your lawn looking its best.
- Best Rain Barrels – Collect rainwater to help keep your garden watered while conserving resources.
- Best Homemade Weed Killers – Simple DIY solutions for managing weeds without harsh chemicals.
- Beekeeping for Beginners – If you’re interested in supporting pollinators, this guide explains how to get started with backyard beekeeping.
- Growing an Apartment Garden – For gardeners who live in small spaces but still have a green thumb.
Gardening is always a work in progress, and every season brings something new to learn. Try a few different ideas, see what works best in your space, and enjoy watching your garden grow.
How Did Your Raised Garden Bed Turn Out?
One of the fun parts of projects like this is seeing how different gardeners adapt the idea to fit their own space. If you built a raised garden bed using this guide, we’d love to hear about it. What size bed did you make? What are you growing? Did you add any creative touches?
Share your ideas or tips in the comments below, your experience might help inspire another gardener getting started.